Different Ways of Setting up Assignee or Reporter in Sinergify
- Category : Mapping
- Article Number : 08
- Publish Date: 24 Jun, 2024
Objective
To show different ways of setting Reporter that save time and increase the agent's productivity by reducing the number of clicks.
Different Ways of Setting Reporter/Assignee.
- Searching in Real-Time
- Setting Default Value in Admin Settings
- Salesforce User
-
Searching Assignee/Reporter in Real-time
-
Log in to your Salesforce Instance
-
In the App launcher, type “Cases”, and go to the case record for which you want to search for a reporter
-
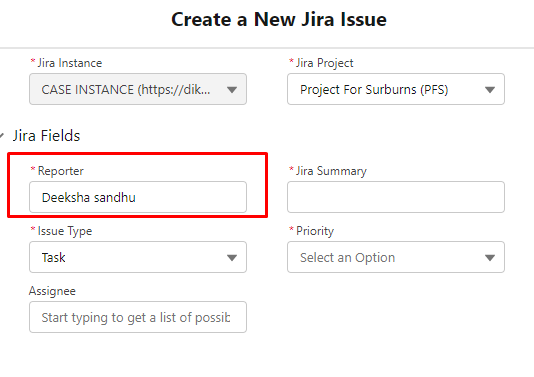
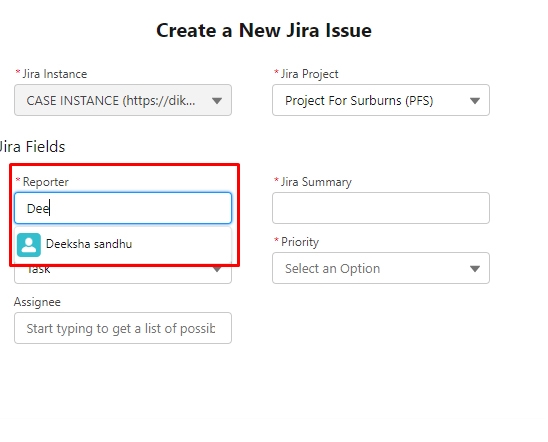
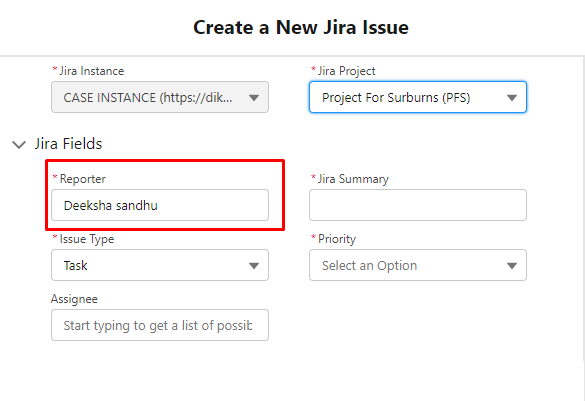
Go to the create a new Jira issue screen, search for the reporter in real-time
-
Refer to the screenshot below to view how to find “Reporter” on the Jira page -
Note: Make sure to Map the Assignee/Reporter fields in the Admin Settings>Field Configuration>Projects Mapping
-
-
Setting Default Value in Admin Setting
This feature allows users to set a default value for any Jira field which is mapped in the Fields Configuration. It also helps to show the default value in the desired field while creating a Jira ticket from Salesforce, eliminating extra effort for filling in a value. Check out the following steps to achieve this. The default value only works if the Jira field is not mapped with the Salesforce field.
-
Log in to your Salesforce Instance
-
Click ‘Admin Settings’ in the App Launcher. Click Default Value from the Fields Configuration sub-tab
-
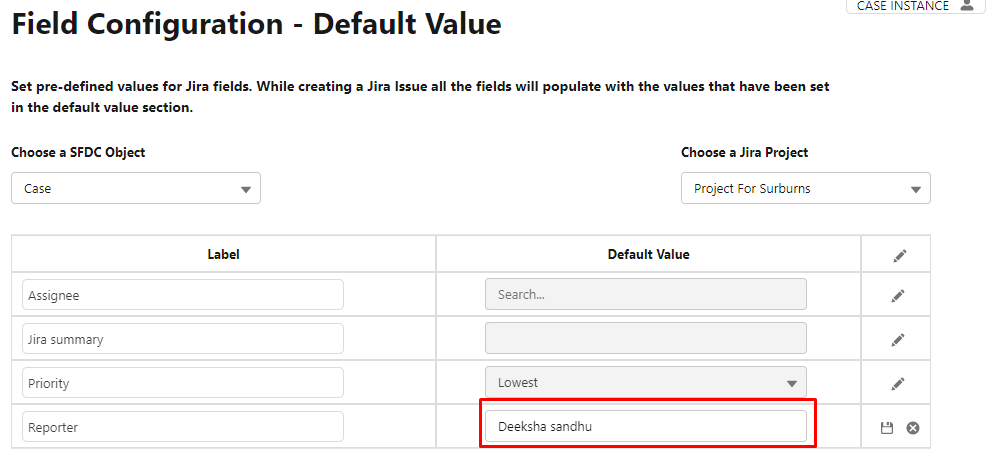
Select an appropriate Jira project for which you want to set a reporter
-
Edit the reporter or assignee and type the default name
-
Once all the values are added, click Save.
-
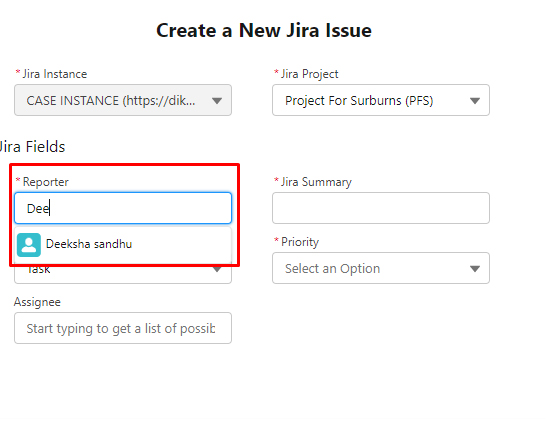
Refer to the screenshot below to view how the “Reporter” will be available on the Jira page -

-
-
Salesforce User
Reporter can be set in two ways as Salesforce logged in user -
-
Salesforce Field
-
Custom Setting
-

-
Salesforce Field
-
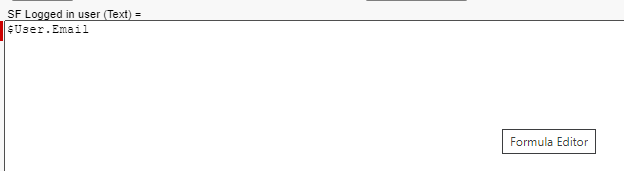
You can create any field using Salesforce Field and it should contain the email address of the Salesforce user. Also, there should be a Jira user with the same email address in the Jira environment, so that you can map those fields.

-
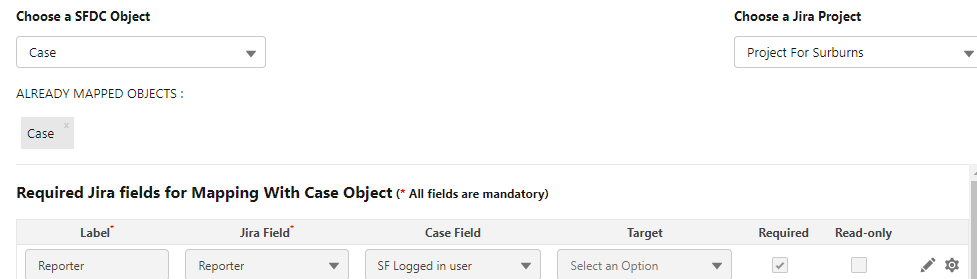
Map the reporter with the newly created field. See the reference screenshot below where we created a new field ‘SF Logged in user‘ and map it with the Reporter field.
-
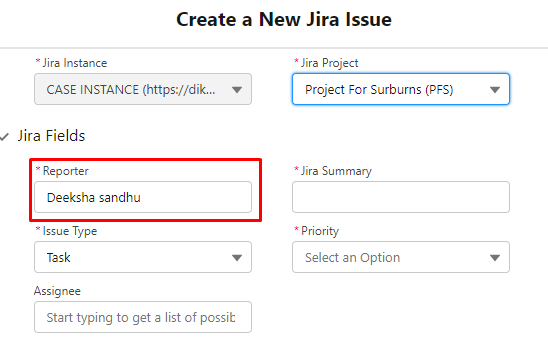
Refer to the screenshot below to view how the “Reporter” will be available on the Jira page -

-
-
Custom Setting

-
Log in to your Salesforce Instance
-
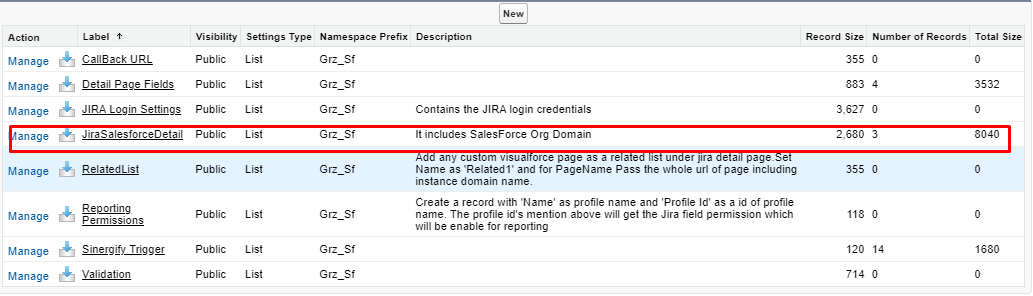
From ‘Setup’, enter ‘custom settings’ in the ‘Quick Find’ box and click on it from the search results. Then click on ‘JiraSalesforcedetail’.
-
Click ‘Manage’
-
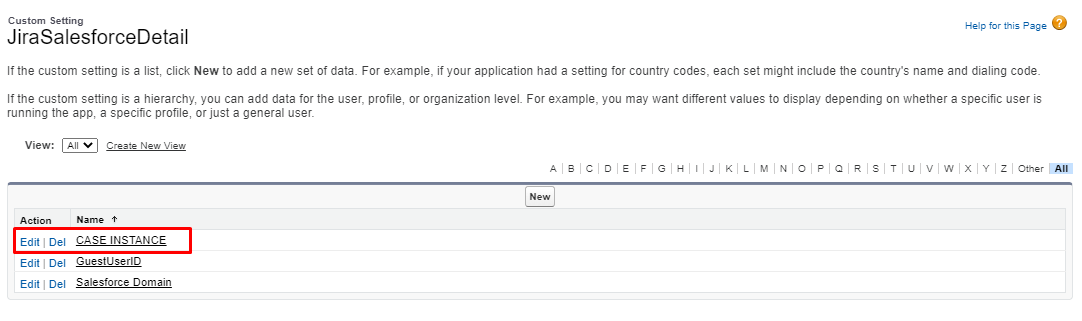
You will see all the Jira instances that you have added in your Salesforce Org. Edit the Jira instance for which you want to configure the settings. For example, in the screenshot given below, we will be configuring changes for Case Instance.


-
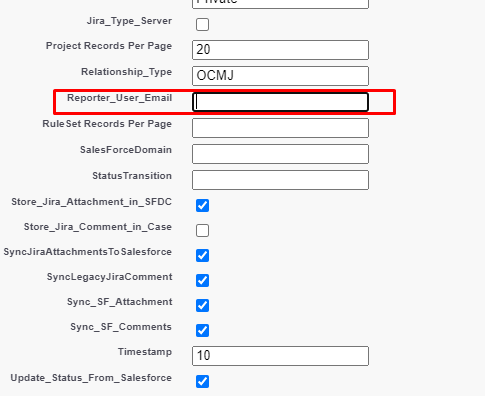
Click on the “Edit” Case Instance and then search “Reporter user email”.
-
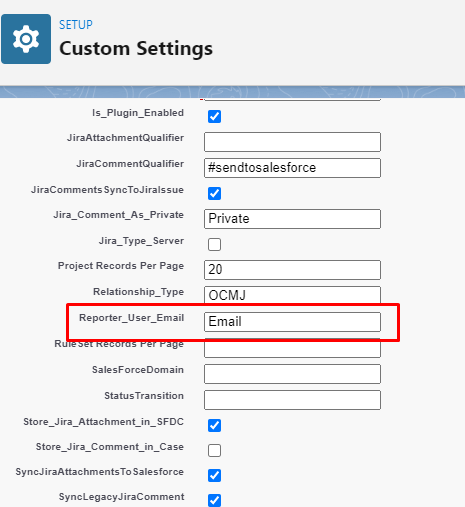
On the JiraSalesforcedetail edit page, enter values in the following fields:

[Reporter user email: email/username]
-
Once done, click Save.
-
Refer to the screenshot given below to view how the “Reporter” will be available on the Jira page-